Friday, September 29, 2006

MOSS 2007 Solve problems with standard workflows after Beta2TR upgrade

When you upgrade MOSS 2007 to Beta2 Technical Refresh and you notice that your standard workflows do not function - make sure that you have performed step 10 in the upgrade process as documented by Amanda in the SharePoint 2007: Updating MOSS Beta2 to Beta2 Technical Refresh (Beta2 TR)

Step 10: Update Existing Form Services Templates In order to upgrade any form services or workflow form templates to the technical refresh update, run the following operation from the command line using the stsadm.exe tool. %windir%\Program Files\Common Files\Microsoft Shared\web server extensions\12\bin\stsadm.exe -o reconvertallformtemplates

tags: , , , , , ,

Monday, September 25, 2006

TechEd Europe 2006 - I'll be there as well ...

I noticed Paul Gielens his post about TechEd Europe and decided to add it to my blog as well - if you are doing .Net development - especially SharePoint or Office development and living in Belgium, let me know so that we can exchange some ideas at TechEd ...


Friday, September 22, 2006

Visual Studio Tools for Office 2005 Second Edition Beta

Whow, that is a mouthfull, isn't it ... It seems that there now is a separate Office Developer Center for the VSTO 2005 SE Beta  - VSTO 2005 SE is specifically targetted at developing with the Office 2007 clients but there are some enhancements for Office 2003 development as well.  The previous version of this beta, was called Cypress - another important thing to know that this is not VSTO "v3" since VSTO "V3" will only be available in the Orcas timeframe. For some more detailed information, take a look at this posting from the Release Program Manager for VSTO

There are two articles which I strongly recommend, you should take a look at - Get a hands on introduction to VSTO 2005 SE and An Inside Look at VSTO 2005 SE Design

Some new features in VSTO 2005 SE:

  • Managed code application-level add-ins for some of the most popular Office applications: Outlook, Excel, Word, PowerPoint, InfoPath and Visio.
  • Programming model and runtime support for key Office 2007 features including the ribbon, custom task panes, and Outlook form regions.
  • Design-time support for InfoPath 2007 form templates.
  • Compatibility and maintainability assurances. The VSTO 2005 SE Beta assures that the applications you’ve built on Office 2003 with VSTO 2005 continue to run with the 2007 Office system.
  • Support for more versions of Visual Studio 2005. VSTO 2005 SE Beta now runs in Visual Studio 2005 Professional (stand-alone), in addition to those versions already supported, including all of the MSDN subscriptions and Visual Studio Team System.

You can download VSTO 2005 SE here - but take a look at the installation notes, there are some things you should watch out for:

  • Make sure you only have one version of Office installed
  • Completely remove previous versions of VSTO v3 CTPs

tags: , , ,

Wednesday, September 20, 2006

Some more Beta2TR stuff

If you run into trouble with the Office 2007 Beta 2 Technical Refresh take a look at the Office 2007 Beta Known Issues/Readme list . I also saw a strange warning from Eric Lam - Important file format notice for 2007 Office System Beta 2 Technical Refresh 

Any files save in the new file formats from Beta 2 will not open in Office 2007 Beta 2 Technical Refresh.  You should save these files in the legacy file formats prior to upgrading to B2TR.

Up untill now, I haven't had any problems with opening Beta2 files with the Beta2TR release - only some warning in Excel 2007 about loosing some formatting (very low impact - I did not even notice what was lost).

Andrew also posted a workaround for the problem with MOSS 2007 Beta 2 WCM/publishing sites which were broken during the Beta2 Technical Refresh installation.

tags: , , , , ,

Saturday, September 16, 2006

Upcoming meetings BIWUG (Belux Information Worker User Group)

After a long and deserved summer break, we are ready again to start our monthly sessions. And be ready for some exciting stuff the coming months. As you all are aware, the next 6 months will be very important for anybody who follows up what Microsoft is doing in the IW space with of course the release of the new 2007 Office System. We have two meetings planned so far. Here are the details:

September Meeting

Tuesday, 19th of September, 18:00 PM – 21:00 PM

Location: DigiPoint, Oudenaarde – see the route description on the www.biwug.be site

Theme of the evening session is Records Management – a very exciting new addition to SharePoint.

Agenda:

18:00 – 18:30      Welcome and Introduction

18:30 – 19:00      Community Briefing

19:00 – 19:15      Break

19:15 – 19:45      Overview Records Management with MOSS 2007

19:45 – 20:45      Demonstration Meridio Products

20:45 – 21:00      Closing Note

All attendees will receive that evening a CD-ROM with plenty of material to prepare for the upcoming Office release.

Register here.


October Meeting

Saturday, 14th of October, 09:30 AM – 13:00 AM

Location: to be determined

Theme of this session is Upgrade and Migration – a very hot topic indeed

Agenda:

09:30 – 10:00      Welcome and Introduction

10:00 – 10:45      Community Briefing
10:45 – 11:00      Break

11:00 – 12:00      Upgrading Windows SharePoint Services v2 and SharePoint Portal Server 2003

12:00 – 13:00      Migrating CMS 2002 Sites to MOSS 2007

An important decision we have made during the latest board meeting is that from now on, anyone can attend the sessions. No fee is applied anymore. So, spread the word ...

tags: , , , , , , , , , ,

Friday, September 15, 2006

Installing WSS 3.0 Beta2 TR – the slipstream approach with screenshots

Installing updates during an initial product installation is something we are already used to from Windows installations - this process is called slipstreamed installation. However for Windows SharePoint Services Beta2 Technical Refresh this is something new. In a slipstreamed WSS 3.0 installation, the WSS setup files are able to find update files in the product's Updates folder, sequence them and then apply those files during product installation. This is similar to the same model which is also available for the Office 2007 clients - as described in Streamlined customization model for the 2007 Office System and Consolidated updated process for the 2007 Office System

Step 1: Preparing your environment

Setup a clean Windows 2003 Server with Service Pack 1 applied - in this example I have also installed a SQL Server 2000 with SP4 applied on the same server. You will also need to install the IIS components .

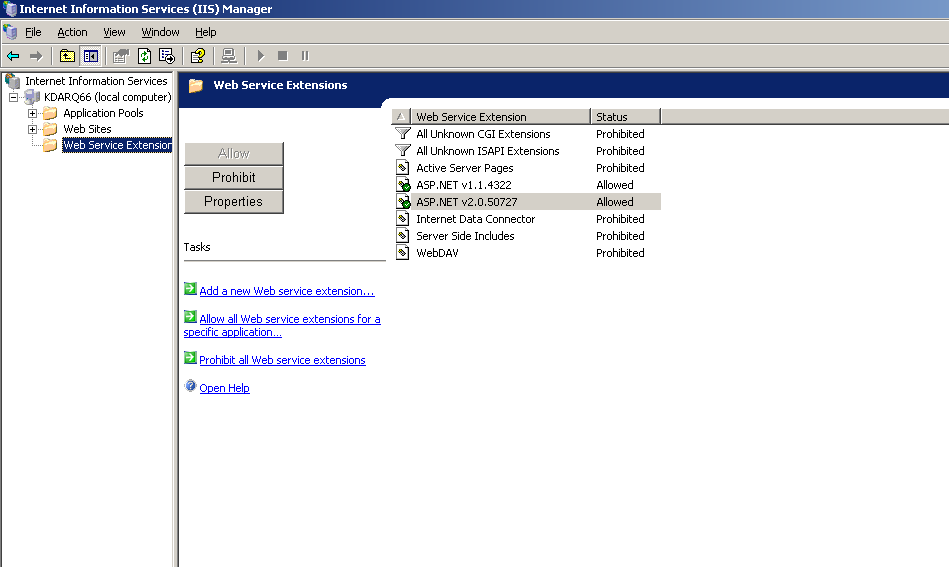
Install the .Net Framework 2.0 and enable ASP.NET 2.0 Web Server extensions in IIS. If you don't see the ASP.NET 2.0 components in the MMC snap in, enable them with the aspnet_regiis tool – see http://msdn2.microsoft.com/en-us/library/k6h9cz8h.aspx


Step 2: Install .Net Framework 3.0 RC1

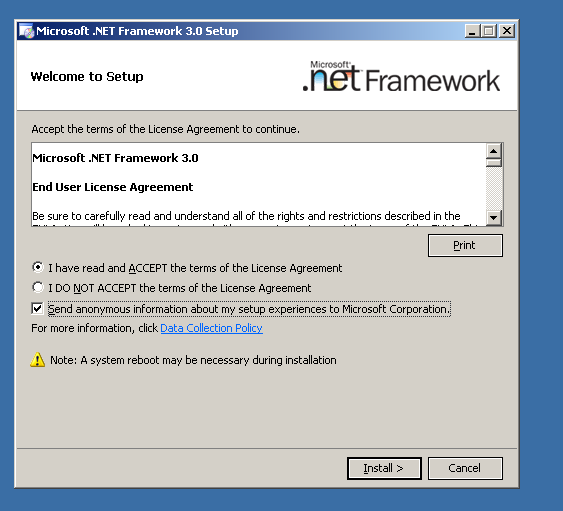
Install the .Net Framework 3.0 RC1 (Formerly know as WinFX) http://www.microsoft.com/downloads/details.aspx?FamilyID=19E21845-F5E3-4387-95FF-66788825C1AF&displaylang=en

Accept the End User License Agreement and click the Install button.


A message will appear when the setup has completed successfully.


Step 3: Unpack the SharePoint Beta2 installation files and the Beta2TR patch files

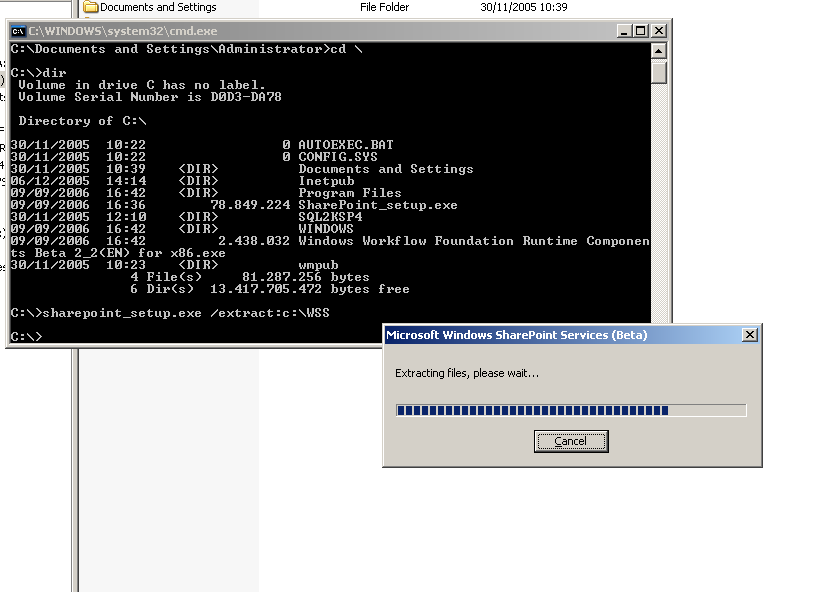
Windows SharePoint Services Beta2 was distributed as an executable package - sharepoint_setup.exe. You will need to extract these installation bits – go to command prompt and use the following command:

sharepoint_setup.exe /extract:c:\WSS


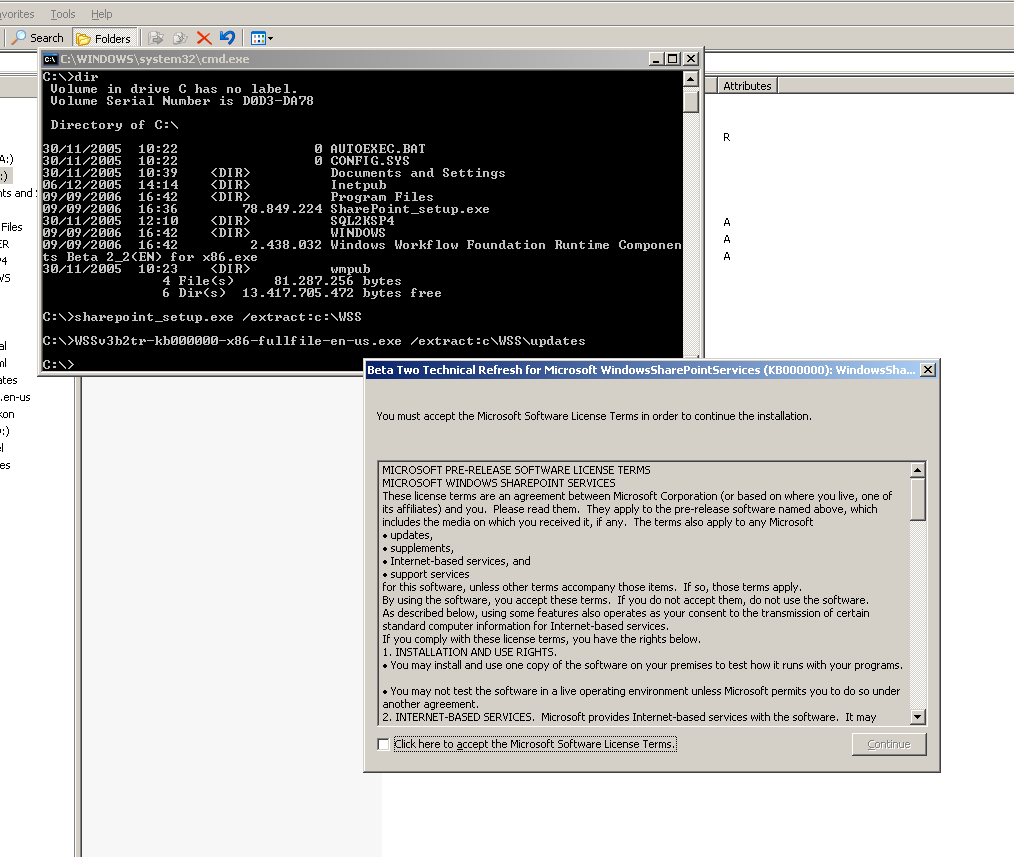
Navigate to the extracted files and notice that there is an Updates folder - this should only contain a README.TXT file. You will need to extract the Beta2TR patch files to this folder - use the following command:

WSSv3b2tr-kb000000-x86-fullfile-en-us.exe /extract:c:\WSS\Updates

This will extract 3 msp files in this folder : sts.msp, wss.msp and wssmui.msp


Step 4: Install Windows SharePoint Services Beta2TR in slipstream mode

Install Windows SharePoint Services Beta2TR by clicking setup.exe.

Accept the User License Agreement and click Continue


Choose the Advanced Setup for installation on a single server or in a web farm. Choose the Advanced Setup if you are going to use a SQL Server 2000 or SQL Server 2005. If you choose the Basic installation option – SQL Server 2005 Express will be installed and used as database.


In the next step, you can choose Stand Alone install – which will also install the SQL Express database engine or you can choose web front end. If you specify web front end – you will need to specify the database server you will use later in one of the steps of the SharePoint Configuration Wizard.


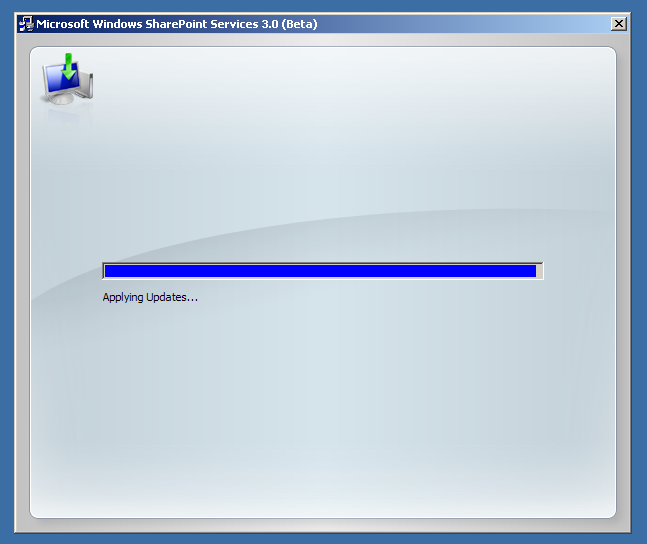
The installation wizard will first install the Beta2 files and afterwards the Updates as you see in the screenshot below.


Step 5 : Running the SharePoint Configuration Wizard.

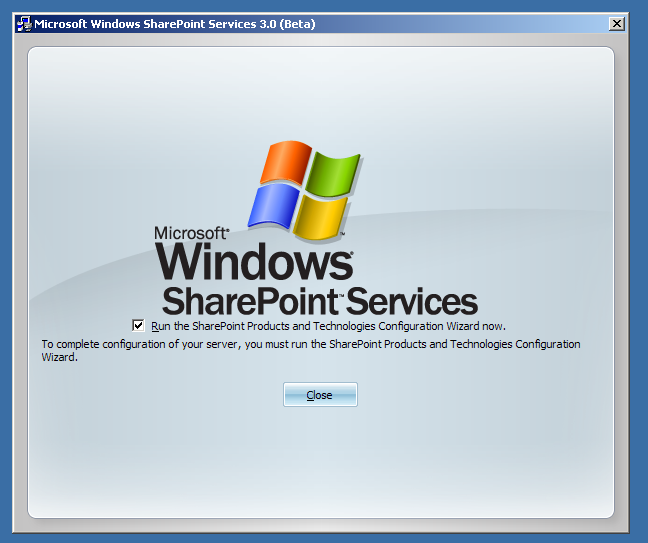
If you left the checkbox in the previous screen, the SharePoint Configuration Wizard will start up immediately. To run the configuration wizard manually, select Start, then Programs, Administrative Tools and SharePoint Products and Technologies Configuration Wizard.


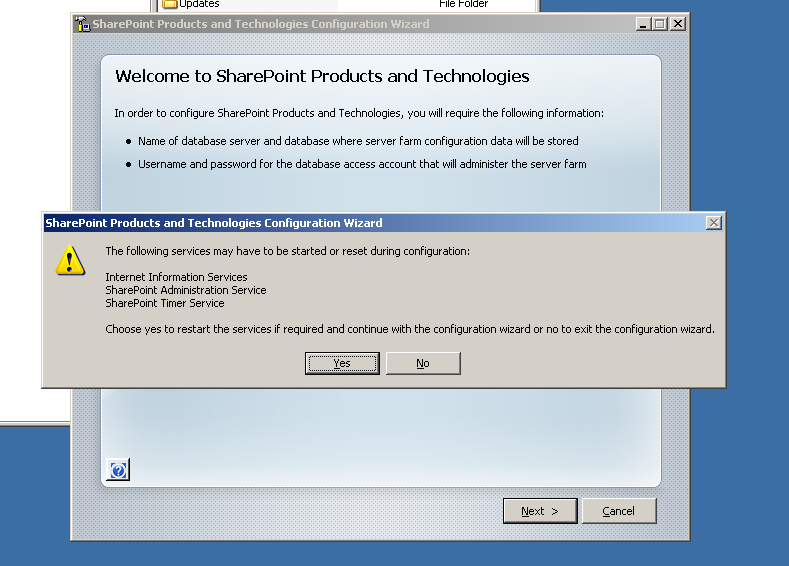
Click Next to launch the wizard - A window will appear advising of the services that will be reset during the configuration process. Click the Yes button to continue.


Select your server farm configuration - select "No, I want to create a new server farm" when you are doing a new installation (Even when you will only do a single server installation).


Specify the Configuration Database Settings - the database server,the database name and the database access account.


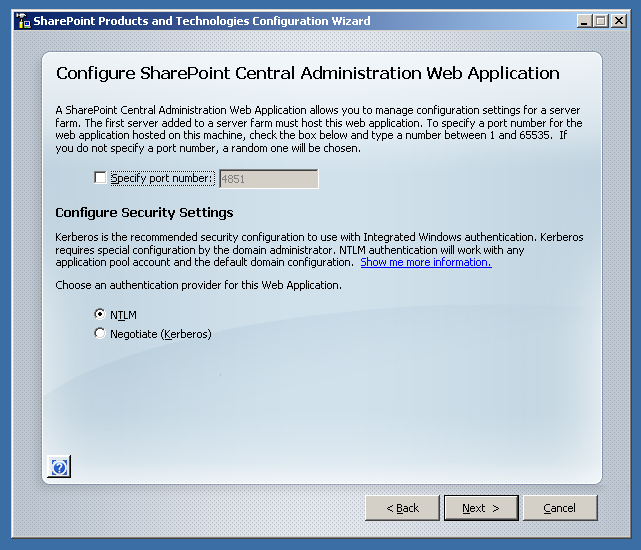
Choose the location where the SharePoint Central Administration site will be created and configure the authentication provider for the SharePoint Central Administration site. Kerberos is the preferred installation option but requires some extra configuration – see http://support.microsoft.com/?kbid=832769


After you have completed the previous steps you will see a summary of the configuration settings which will be applied. Click Next to complete the configuration.


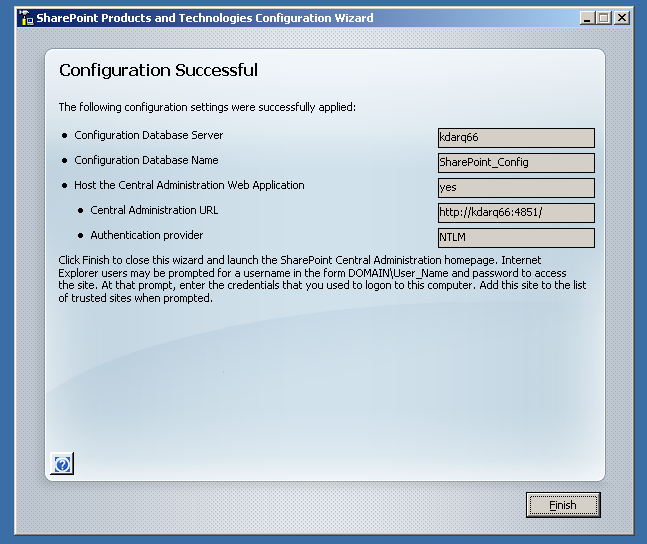
When the configuration has completed successfully you will see the "Configuration Successful" screen.


Open the SharePoint Central Administration site , you should see the Administration task list.


Click on the Application Management tab and click the Create or Extend Web Application. A Web Application is the equivalent of what was called a Virtual Server in Windows SharePoint Server 2.0 and SharePoint Portal Server 2003. When you create a new web application you extend an IIS website to be serviced by Windows SharePoint Services


Once the Web Application has been created, you can create a new site collection.


So here you have it, your own nice clean Windows SharePoint Services Beta2 TR site ... happy sharepointing ...

Thursday, September 14, 2006

WSS 3.0 and MOSS 2007 Beta2 Technical Refresh (Beta2TR) are finally here

The Beta2 Tech Refresh is finally available for Microsoft Office SharePoint Server 2007 (32 bit version) (64-bit version here) , Windows SharePoint Services 3.0 (64-bit version here ), Forms Server (64-bit version here), SharePoint Designer and the Office 2007 clients – this is a patch for the current Beta2 versions. As Dustin already pointed out – if you need a full install you will need to create a slipstreamed install – he has added a nice screencast about the slipstream install and take a look at Steve Smith’s Beta2TR installation doc.

Besides the Beta2 TR patches there are also a number of other plugins and tools released targeted at the Beta2TR release:

· Microsoft .NET Framework 3.0 - Release Candidate - Build 3.0.04324.17

· Microsoft® Office Word 2007 Redaction Add-in (Beta) - Version 2.0 - The Microsoft® Office Word 2007 Redaction Add-in makes it easy for you to mark sections of a document for redaction. You can then redact the document so that the sections you specified are blacked out. You can either print the redacted document or use it electronically. In the redacted version of the document, the redacted text is replaced with a black bar and cannot be converted back to text or retrieved.

· Microsoft® Office Outlook® 2007 Calendar Views Add-in - Version 2.0 - With the Outlook® Calendar Views Add-in, you can easily create and manage filters to display subsets of appointments in Outlook Calendar. Filtered views are based on categories that you apply to appointments.

· 2007 Microsoft Office Addins : Microsoft Save As PDF or XPS

If you are working with Publishing sites in Beta2 – also take a look Andrew Connell his posting - Upgrade issue for WCM/Publishing Sites (a ~must~ read before upgrading your beta environment

This is the text as it appeared on Betaplace:

We've listened carefully to your feedback and have developed a technical refresh with significant performance improvements and redesigns to address your needs and to enhance your user experience. New features of the Beta 2 Technical Refresh include an updated user interface, better accessibility support, improvements in the robustness of the platform, and greater functionality. For example, you can now deploy code access security policies with your SharePoint sites, as well as experience TimeZones and TimeZone objects that provide object model support in Microsoft Office Outlook. Look out for the Beta 2 Technical Refresh SDKs as well, which add many more articles and code samples to help jumpstart development.

Before starting an upgrade also take a look at this posting on the SharePoint team blog - Installing Beta 2 Technical Refresh (B2TR) – What you need to know before you double click update.exe. But you can also go directly to the updates guides:

  • SharePoint Server 2007 B2TR Update Guide – This includes all of the update steps, known issues, workarounds and planning guidance.

o http://technet2.microsoft.com/Office/en-us/library/f49862ab-e067-4723-bb90-7eb1182c65ce1033.mspx?mfr=true 

There are already a couple of stories and blog posts out there:

· Review: Microsoft Office 2007 Beta 2 Technical Refresh

· Office 2007 Beta 2 Technical Refresh Adds UI, Performance Improvements

· New Office Release Tomorrow,

· Permanent Link to Yeah! Office Beta 2 TR...

· Final Public Office 2007 Test Build Due...

· Office 2007 Beta 2 TR: Start Revving Those...

· Beta 2 Technical Refresh available tomorrow – some explanations from Jensen Harris about the new UI improvements

· Office 2007 Beta2TR now available

· Office 2007 creeps toward release


tags: , , , , , , ,

Tuesday, September 12, 2006

Office 2007 Beta2 Technical Refresh (Beta2TR) release imminent

The SharePoint team blog just published something about the Office 2007 Beta2 Technical Refresh (TR) and Lawrence posted some guidance as well… all things which point to imminent release of the technical refresh. If there is only one thing that you will remember from these postings it is the fact that you will definitely need to READ THE INSTALLATION GUIDE BEFORE RUNNING THE UPGRADE …

Bill posted more or less the same advice but also pointed to an Excel sheet which gives an overview of new features in WSS 3.0 and the different versions of Microsoft Office SharePoint Server 2007

Tags:
sharepoint2007
, sharepoint+2007, moss, moss2007, wss30

Wednesday, September 06, 2006

Usercontrols (ascx), webparts and SharePoint 2007

One of the few things we are still missing in Visual Studio 2005 is the ability to visually design webparts for SharePoint 2007. In ASP.Net 2.0 you can use a web user control (ascx) as web part when it implements the IWebPart interface because  of the ASP.Net 2.0 GenericWebPart class . The GenericWebPart control exists to provide a run-time wrapper for server controls that are not WebPart controls, so that such controls can be used in Web Parts pages and applications. Unfortunately, this GenericWebPart is not available SharePoint 2007 - so you have to build your own wrapper - but this is not very hard as I will show in this posting.


First create an empty web site, afterwards add one user control wpgrid.ascx  To make things easier, uncheck the "Place code in a separate file" when adding the user control.  Switch to design view and add a GridView Control - let's call it gvDemo, set autogeneratecolumns to false and add one bound column (Datafield=Title). Now create a directory usercontrols at the root of your SharePoint site - for my default SharePoint 2007 site, this is C:\Inetpub\wwwroot\wss\VirtualDirectories\80. Copy the wpgrid.ascx file to this location.

Now let's create a new web part - as you probably already know, you can now uses ASP.Net 2.0 webparts in SharePoint 2007 - if you don't have any experience with web parts - check out Marts  - Create a SharePoint 2007 web part step by step. The web part will show the title of all items in a list in the grid with paging enabled  - so first create a web part property with the name of list you want to show.


public class UCWebPart : System.Web.UI.WebControls.WebParts.WebPart
{
private UserControl usercontrol;
private GridView gvDemo;
private const string defaultlist = "";
private string _listtolink = defaultlist;
protected DataTable dtDemo = null;

[Personalizable(), WebBrowsable(),
WebDisplayName("List to display"),
WebDescription("Name of the list in this site to display")]
public string ListToLink
{
get { return _listtolink; }
set { _listtolink = value; }
}


Override the CreateChildControls method, where you will load the user control, set the necessary properties and create an event handler to implement the paging on the gridview.


protected override void CreateChildControls()
{
try
{
base.CreateChildControls();
this.Controls.Clear();
this.GetData();
usercontrol = (UserControl)Page.LoadControl(@"/usercontrols/wpgrid.ascx");

gvDemo = (GridView)this.usercontrol.FindControl("gvDemo");
gvDemo.AllowPaging = true;
gvDemo.DataSource = dtDemo;
gvDemo.PageSize = 3;
gvDemo.PageIndexChanging += new GridViewPageEventHandler(gvDemo_PageIndexChanging);
this.Controls.Add(usercontrol);

gvDemo.DataBind();


}
catch (Exception ex)
{
EventLog.WriteEntry("WebParts", "UCWebPart" + ex.ToString());
}
}

void gvDemo_PageIndexChanging(object sender, GridViewPageEventArgs e)
{

gvDemo.PageIndex = e.NewPageIndex;
gvDemo.DataBind();
}


The GetData() method loads the DataTable with the title of the different items in the list:


private void GetData()
{

try
{
if (ListToLink.Length > 0)
{
dtDemo = new DataTable();
dtDemo.Columns.Add("Title", Type.GetType("System.String"));

SPWeb site = SPContext.Current.Web;
SPList list = site.Lists[_listtolink];

foreach (SPListItem item in list.Items)
{
DataRow newRow = dtDemo.NewRow();
newRow["Title"] = item["Title"];
dtDemo.Rows.Add(newRow);

}
}
}
catch (Exception ex)
{
EventLog.WriteEntry("WebParts", "UCWebPart - Retrieving items from " + _listtolink + "-" + ex.ToString(), EventLogEntryType.Error);
}
}
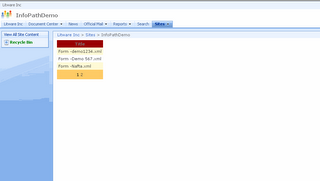


PS. You can also use the  SmartPart v2 (aka SonOfSmartPart) to load ASP.Net 2.0 user controls in SharePoint 2007 web parts ... but as you have seen above, it is quite easy to do it yourself...


Tags: , , , , , ,


Currently listening : Adema - Unstable Disc 1

Sunday, September 03, 2006

Rendering an InfoPath 2007 form in a web part

The white paper - Hosting the InfoPath 2007 Form Editing Environment in a Custom Web Form shows how you can use the XMLFormView control to load InfoPath forms in a web page, but it is also quite easy to do this in a SharePoint web part. This posting will show you how to do this. For some nice screenshots, check out Patricks posting, unfortunately he forgot to post some code ;-) ...

If you want to use the XMLFormviewer control, you will first need tot add a reference to the Microsoft.Office.InfoPath.Server dll - which you can find it in the Program Files\Microsoft Office Servers\12.0\bin directory. The XMLFormviewer control determines which InfoPath form to load through the XSNLocation property - so I will create a web part property for this as well.

It is also quite easy to read/write fields within the InfoPath fields - this provides some interesting possibities in combination with the fact that you can easily define web part connections.  You can do this from within the OnInitialize event handler without having to call the DataBind. To access the InfoPath fields you can use the new InfoPath 2007 object model - check out Design once and the new InfoPath 2007 Object Model . Add a reference to the Microsoft.Office.InfoPath.dll ( Program Files\Microsoft Office Servers\12.0\bin directory ) to manipulate the InfoPath form. Tip: Retrieve the  xNavMain.InnerXml first - and use a program such as Visual XPath to find the appropriate namespace and XPath expression.


namespace WebParts
{
public class InfoPathViewerWebPart : System.Web.UI.WebControls.WebParts.WebPart
{
private const string defaultxsnlocation = "";
private string _xsnlocation = defaultxsnlocation;
private XmlFormView viewform;

[Personalizable(), WebBrowsable(),
WebDisplayName("XSNLocation"),
WebDescription("URL of the web-enabled InfoPath form to display")]
public string XSNLocation
{
get { return _xsnlocation; }
set { _xsnlocation = value; }
}


protected override void RenderContents(System.Web.UI.HtmlTextWriter writer)
{
base.RenderContents(writer);
this.EnsureChildControls();
}

protected override void CreateChildControls()
{
base.CreateChildControls();
viewform = new XmlFormView();
if (_xsnlocation.Length > 0)
{
viewform.XsnLocation = _xsnlocation;
}
viewform.Initialize += new EventHandler<InitializeEventArgs>(viewform_Initialize);

this.Controls.Add(viewform);
}

void viewform_Initialize(object sender, InitializeEventArgs e)
{
try
{
XPathNavigator xNavMain = viewform.XmlForm.MainDataSource.CreateNavigator();

XmlNamespaceManager xNameSpace = new XmlNamespaceManager(new NameTable());
xNameSpace.AddNamespace("my", "http://.../office/infopath/2003/myXSD/2006-08-07T07:37:16");
XPathNavigator fSummary = xNavMain.SelectSingleNode("/my:myFields/my:Summary", xNameSpace);
if (fSummary != null)
{
fSummary.SetValue("Hello InfoPath");
}
else
{
EventLog.WriteEntry("InfoPathWebPart", "fSummary not found", EventLogEntryType.Information);
}

}
catch (Exception ex)
{
EventLog.WriteEntry("WebParts.InfoPathViewerWebPart", ex.ToString(),EventLogEntryType.Error);
}

}


}


Tags: , , , , , , ,


Currently listening: Alien Ant Farm - ANThology

Saturday, September 02, 2006

InfoPath 2007 and Forms services : opening forms from a hyperlink

If you want to integrate web-enabled InfoPath 2007 forms into your own web pages, you can just add a link to them. You will need to use a href to an ASPX page http://<server>/_layouts/FormServer.aspx with the followingQuery parameters:

  • XsnLocation - What form to open and from where
  • XmlLocation - What initial data to use
  • OpenIn - Open in browser / client / either
  • SaveLocation - Save Location for data (Make sure that you add this one, if you want the close button to be visible …)
  • Source - Navigate URL when form is closed

Example :

http://servername/_layouts/formserver.aspx?xsnlocation=/formservertemplates/loanapplication.xsn&openin=browser

Technorati : , , , , ,,

Friday, September 01, 2006

Wednesday, August 30, 2006

Using webservices in browser-enabled forms with InfoPath 2007 Forms Services

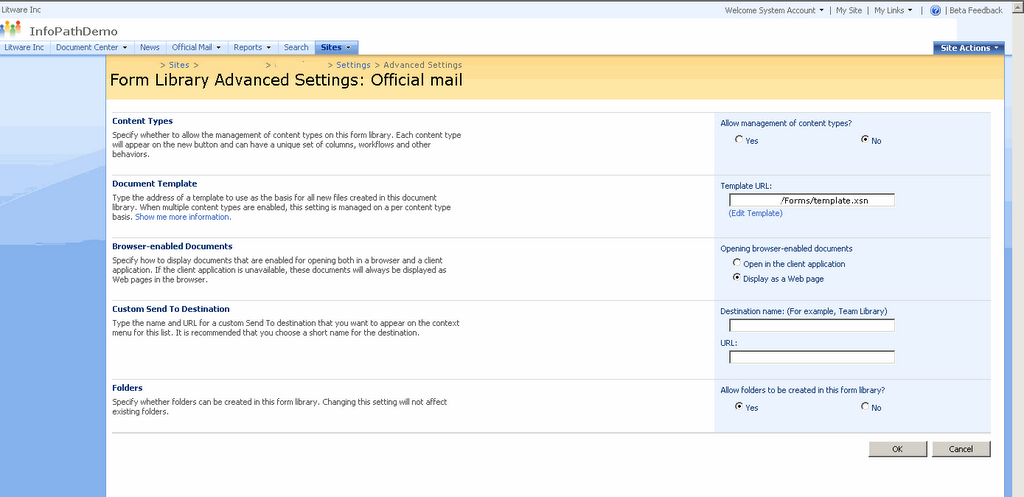
InfoPath 2007 in combination with either Microsoft Office SharePoint Server 2007 or Windows SharePoint Services allows you to create web-enabled InfoPath forms - this means that you don't need a full InfoPath client installation to let your users fill in a form.(For more info see InfoPath Forms in Office SharePoint Server 2007). To make a InfoPath 2007 form web-enabled - you simply publish it to a SharePoint forms library. Next you go to the Forms library Settings > Advanced Settings. Change Opening Browser-enabled documents to Display as a web page.


These web-enabled forms do have some limitations however as outlined in this post - Functionality lost in InfoPath 2007 "Web-Enabled" Forms. InfoPath has always been very strong at consuming web services and using data returned from these web services in the forms. If you want to use a web service as a datasource within an web-enabled InfoPath form there are some things you need to do to accomplish this - especially when you use a webservice which does not run within the context of SharePoint. When you access a webservice from an web-enabled InfoPath form, Internet Explorer will consider this as a cross-domain setup. So your InfoPath form may work correctly when opening it from your SharePoint with the full client but will give an error when opening in the web browser - "An error occurred accessing the data source in the browser" when not configured correctly.

So here are the steps that you need to complete to get it to work:

  • First make sure that cross domain access is enabled for InfoPath Forms Services - Go to SharePoint Central Admin > Switch to the Application Management tab. Underneath InfoPath Forms Services - Choose Configure InfoPath Forms Services. Check "Allow cross domain access for user templates"
  • Use the Data Connection Library to store the connection setttings to the web service. A Data Connection Library (DCL) is a new type of SharePoint document library which provides a place to store, manage and share connection files. For more info about DCLs - check out Excel Services part 10: Data Connection Libraries, or connecting to databases made easy, manageable, and secure .  Open your your locally saved InfoPath 2007 form in Design View. Select Tools - Data Connections. Select your web service connection and click the Convert button. For the name enter something like http://servername/DataConnectionLibName/WebService.udcx (Ignore the warning that you get ... this will be fixed in post beta2 builds) Once the connection has been converted to a data connection file, save the form locally again and  publish it to the SharePoint forms library.

Voila, and now you can use your webservice as well from an InfoPath form within the browser ... if you have questions, do no hesitate to add it to the comments ...

tags: , , , , , ,,

Tuesday, August 29, 2006

Using Windows Live Writer

Another week – another blog writing tool – yesterday I downloaded Windows Live Writer Beta - this definitely seems to be an interesting software  and some guys are even writing plugins for Live Writer . I already installed the Syntax Highlighter which allows me to copy/paste C# code with the same highlighting as Visual Studio.  Also take a look at Jeftek list of LIve Writer plugins.
tags: , , ,

Monday, August 28, 2006

PRAjax - Open Source Ajax Helper Library for PHP

I just saw this blog posting from one of my co-workers – Maarten Balliauw about the open source Ajax Helper Library project he has started … interesting stuff – definitely check out the project on SourceForge .

InfoPath 2007 – solving XSN can not be used on server


With Microsoft Office SharePoint Server 2007 it is possible to use InfoPath forms to get feedback from users within a workflow A good starting point is the white paper – Walkthrough : Creating Office SharePoint Server 2007 workflows with Visual Studio but there are still some things you should really now before starting developing your own workflows on top of the SharePoint 2007 platform. This is the first of a series of postings about workflow in SharePoint 2007.

InfoPath 2007 is used in a couple of places in a SharePoint driven workflow:

When you want to develop a SharePoint workflow with Visual Studio 2005 you will first need to install the SharePoint workflow project templates. These Visual Studio project templates are installed when you install either the ECM Starter Kit (for Microsoft Office SharePoint Server ) or the Workflow Developer Starter Kit for Windows SharePoint Services 3.0.

When you start a new SharePoint workflow project, you will notice that the solution contains a number of files which are used to define the workflow solution – one of them is the workflow.xml file. In this file, you will need to specify the InfoPath forms you will be using by specifying the URNs. To find the URN of an InfoPath form, open the form in InfoPath in design mode and choose properties from the file menu.

<MetaData>

<Instantiation_FormURN>urn:schemas-microsoft-com:office:infopath:initform:-myXSD-2006-08-09T08-38-04</Instantiation_FormURN>

<Association_FormURN>urn:schemas-microsoft-com:office:infopath:initform:-myXSD-2006-08-09T08-38-04</Association_FormURN>

<Task0_FormURN>urn:schemas-microsoft-com:office:infopath:TaskEdit:-myXSD-2006-08-09T11-19-01</Task0_FormURN>

</MetaData>


Another location where you can find a reference to the InfoPath forms is in the feature.xml file – here you see the next section – make sure that you uncomment the <Property Key=”RegisterForms” Value=”*.xsn” /> line – this specifies that you will copy the InfoPath forms to the same directory as where you deploy the feature.xml file.

<Property Key="GloballyAvailable" Value="true" />

<Property Key="RegisterForms" Value="*.xsn" />

</Properties>


The last file that you need take a look at is install.bat - this will register your workflow solution, copy the necessary files and register the workflow assembly in the GAC.

Things you should watch out for:

  • Design the InfoPath files in a directory separate from your solution and publish them to the same directory (Use publish to network location) in which you have your workflow solution – this way you can simply use the <Property Key=”RegisterForms” Value=”*xsn” /> and use the default line in install.bat - xcopy /s /Y *.xsn "%programfiles%\Common Files\Microsoft Shared\web server extensions\12\TEMPLATE\FEATURES\YourCustomFeature\"
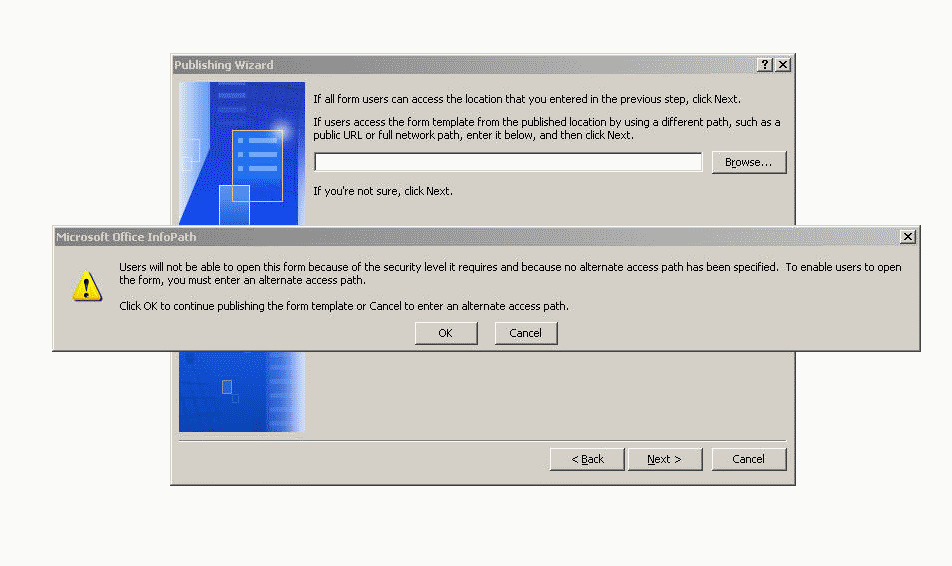
  • Make sure that the Alternate access path is not filled in when publishing the InfoPath files – when publishing it to a network location, you should have received a warning – see screenshot listed below.


If something goes wrong, one of them the infamous “XSN can not be used on the server” error, you can troubleshoot the problem with the following steps:

  • Navigate to a command prompt
  • Navigate to this folder: %programfiles%\common files\microsoft shared\web server extensions\12\bin
  • Execute this command on each of your XSN files: stsadm.exe -o verifyformtemplate -filename <complete path to your xsn including the name.xsn>

This will give a more detailed description - if you are not sure if the access path is filled in for the InfoPath form you have deployed – you can rename the xsn file in the features directory to a CAB file and extract manifest.xsf from this file in this file – you should see that accessPath=""


P.S. For some more tips, take a look at Blood, sweat and Windows Workflow in SharePoint

Thursday, August 24, 2006

Using a contact selector control in InfoPath 2007


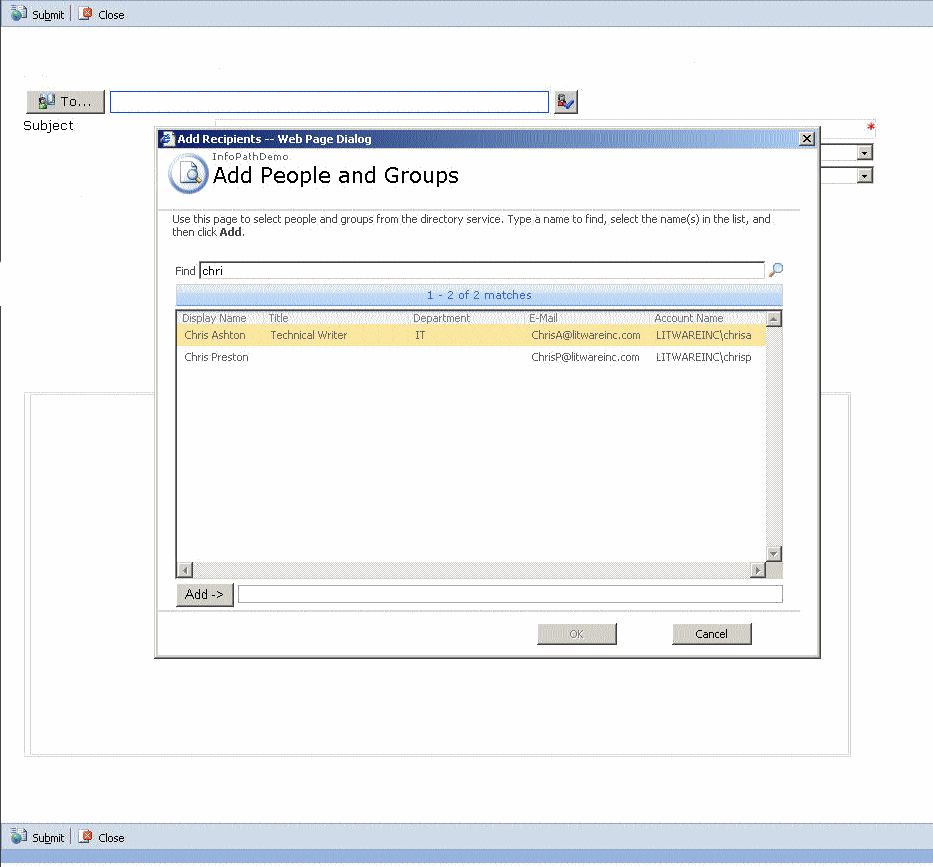
If you want to build electonic forms solutions, InfoPath is the way to go… However, lots of people have built a lot of Outlook Forms in the past, so if you need to replace these forms, you will need to find an easy way for people to select e-mail addresses. Luckily InfoPath 2007 has a new control that enables you to choose e-mail address from an address book – the Contact Selector control – for more info see Open your rolodex from InfoPath using the Contact Selector on the InfoPath Team blog.


But you can also use this Contact Selector control when deploying the InfoPath forms to SharePoint 2007 – this is especially handy when you need to use these InfoPath forms in a workflow scenario. When you publish an InfoPath form to a SharePoint site - it will validate the contacts against the SharePoint server – for more information on how you can do this, take a look at How to: Configure a Contact Selector Control on your InfoPath Workflow form.

Wednesday, August 23, 2006

MOSS 2007 and Exchange 2007

I saw Angus Logan his post about MOSS2007 and Exchange 2007 better together for compliance a while ago and I was very impressed with the functionality described. It is not so clear however where Microsoft Office SharePoint Server 2007 actually comes in:

  • Ability to capture messages between internal and external parties and between internal parties through the use of server side rules.
  • Copy all messages to a central record store, and to journal emails in transit.  
  • The ability for and administrator to search all email across accounts centrally to discover content (never used to be able to do this).
  • Enforce Chinese walls within organisations, important in FSI.
  • Remove the ability to have PST folders.
  • Enforce retention limits on users.
  • Allow users to easily promote emails as records and enforce policy through AD.
  • Create one or more centrally managed record repositories to handle electronic and physical records as well as all email communication.
  • The ability to expire content and define what action should take place once that content has expired.
  • Easily promote documents as records and capture all their meta-data including versions, audit trail etc.
  • Legal holds.

I’m definitely interested in seeing some more postings about these topics. If you have seen some information, please add the link to the comments.

Technorati : microsoft, moss 2007, office12, office2007, sharepoint, sharepoint2007, exchange2007 , exchange12

Sunday, August 20, 2006

Add document properties to advanced search in SharePoint 2007


When looking for more information about how you can add your own document properties to the advanced search web part I first found this information from Ishai Sagi - Found it! How to add properties to advanced search in MOSS 2007 where he demonstrates how you can add a property from the user profile database to the advanced search web part. I was however looking for something different. I created a InfoPath forms library in which I added my own custom fields/properties and I wanted to add these to the advanced search webpart.

This MSDN article - Managing properties explains that the SharePoint 2007 search schema has 2 different types of properties: crawled properties and managed properties. So if you want to use a property in the Search web parts you will need to create a managed property.

Let’s see how you do this:

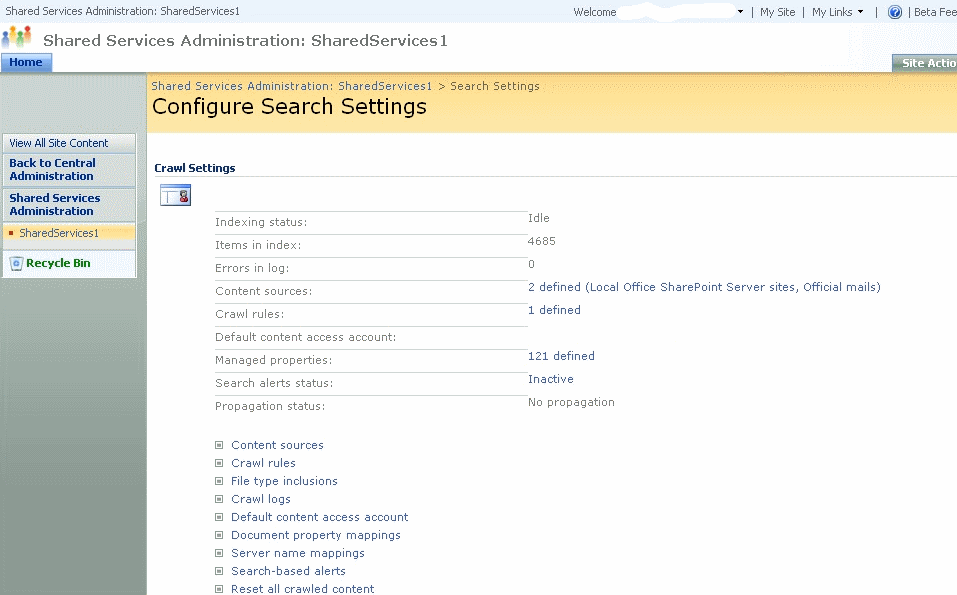
Open SharePoint Central Admin > Go to Shared Services Administration. Go to Search Settings. On the Configure Search Settings, you can see how many Managed properties are defined.


Click on the link behind Managed properties. This will open the Document Property Mappings page. Crawled properties are automatically extracted from crawled content. Users can however only perform queries over managed properties. After you map your crawled property on a managed property you can use it after the next full crawl.


Click New Managed Property – give a name and description and click on the Add Mapping to open the Crawled properties screen and to create the mapping. Let’s create a new managed property called Theme.


Perform a full crawl to make the new Managed Property available


As Ishai describes in his article, you can customize the Advanced Search Web Part by simply modifying the settings. You can also create your own custom search page. Liam also has a great posting about the different new available options to use the SharePoint Search web parts. Now let’s add the new Managed property called Theme :


Open a SharePoint 2007 team site and create a new web part page. Click on Site Actions > Edit Page. Click Add web part > Select Advanced Search Web Part.

Click Modify Shared Web Part - underneath the Properties section, you will see the Properties property – obvious no, ;-) …

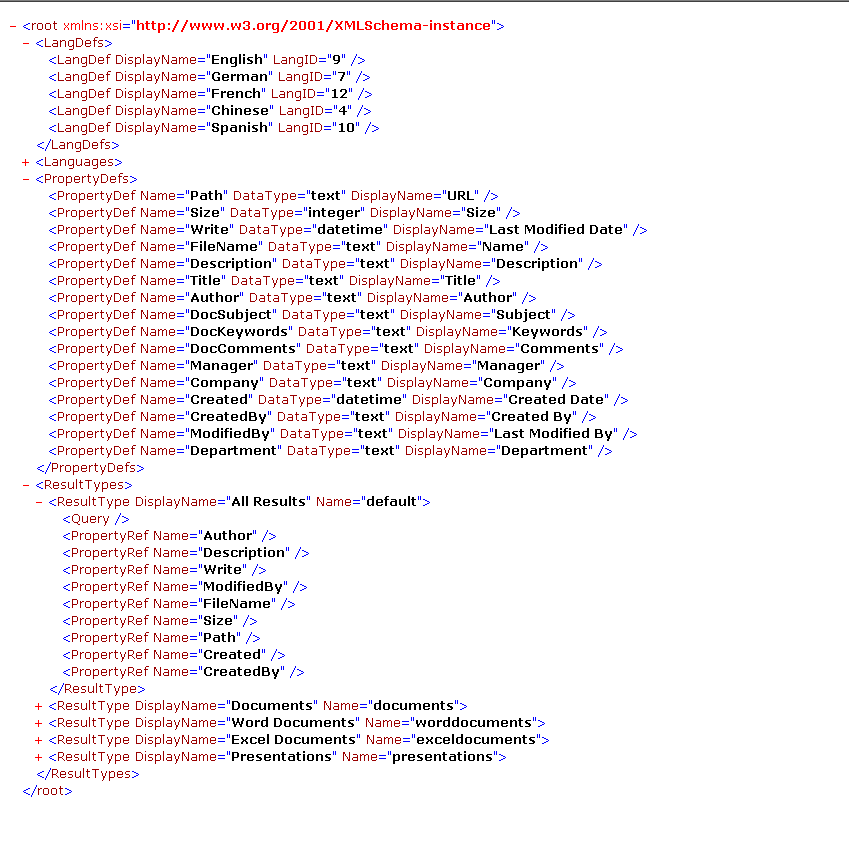
This Properties web part property contains an XML string which defines what are the different options visible in the Advance Search web part. The main XML nodes are these:
  • LangDefs: defines which languages can be used
  • Languages: refers to the LangDefs XML node to actually define which languages are shown in the web part.
  • PropertyDefs: defines which properties can be used, here you need to add your own new managed property - <PropertyDef Name=”Theme” DataType=”text” DisplayName=”Theme” />
  • Underneath the ResultTypes node – you can find the different result types : documents, word documents, excel documents, presentations or All results. To make your own property visible underneath All Results you need to add the next string <PropertyRef Name=”Theme” /> underneath <ResultType DisplayName=”All Results” Name=”default” />


I think that this actually shows that the new SharePoint 2007 web parts already provide a lot of functionality out of the box which can be easily customized. The only thing I’m still waiting for is some more documentation on the subject.

Technorati : microsoft, moss 2007, office12, office2007, sharepoint, sharepoint2007, wssv3 , search

Saturday, August 19, 2006

Retrieving data from Active Directory with System.DirectoryServices – the right way

I recently needed to retrieve to some data from Active Directory in an ASP.Net webservice. After looking around a bit, I stumbled upon this article – Accessing Global Address List via System.DirectoryServices namespace on CSharpCorner. The main piece of code shown is the one below – the object you should take a look at is the DirectorySearcher class.

public ArrayList returngal(){
DirectorySearcher objsearch = new DirectorySearcher();
string strrootdse = objsearch.SearchRoot.Path ; DirectoryEntry objdirentry = new DirectoryEntry(strrootdse);
objsearch.Filter = "(& (mailnickname=*)objectClass=user))";
objsearch.SearchScope = System.DirectoryServices.SearchScope.Subtree;
objsearch.PropertiesToLoad.Add("cn");
objsearch.PropertyNamesOnly = true ;
objsearch.Sort.Direction = System.DirectoryServices.SortDirection.Ascending;
objsearch.Sort.PropertyName = "cn";
SearchResultCollection colresults = objsearch.FindAll() ;
ArrayList arrGal = new ArrayList();
foreach(SearchResult objresult in colresults){
arrGal.Add(objresult.GetDirectoryEntry().Properties["cn"].Value);
}
objsearch.Dispose(); return arrGal ;}

Unfortunately, I noticed that it took quite a long time to retrieve more then 3000 usernames and e-mail addresses from AD. When you take a look at the documentation on MSDN about SearchResult.GetDirectoryEntry() it actually says that it can be slow. You should only need to call the GetDirectoryEntry method when you need to do updates, when you merely want to access/read properties - there are some things you should consider to optimize performance:

  • Only load the properties, you need to use through PropertiesToLoad – if you need to access them directly change PropertyNamesOnly to false. Otherwise you will get nothing back when using the Properties collection directly to retrieve the values.
  • Use this code instead to retrieve the property – objResult.Properties[“cn”][0]- this will work a lot faster
  • If you need to retrieve more then 1000 records back from Active Directory – make sure that you specify the PageSize as well - thank you Michael for this posting – DirectorySearcher.FindAll() should have pagesize=1000

So the right way to write it, would be :

public ArrayList returngal(){
DirectorySearcher objsearch = new DirectorySearcher();
string strrootdse = objsearch.SearchRoot.Path ; DirectoryEntry objdirentry = new DirectoryEntry(strrootdse);
objsearch.Filter = "(& (mailnickname=*)(objectClass=user))";
objsearch.SearchScope = System.DirectoryServices.SearchScope.Subtree;
objsearch.PropertiesToLoad.Add("cn");
objsearch.PropertyNamesOnly = false ;
objsearch.Sort.Direction = System.DirectoryServices.SortDirection.Ascending;
objsearch.Sort.PropertyName = "cn";
objSearch.PageSize = 5000;

SearchResultCollection colresults = objsearch.FindAll() ;
ArrayList arrGal = new ArrayList();
foreach(SearchResult objresult in colresults){
arrGal.Add(objResult.Properties[“cn”][0]);

}
objsearch.Dispose();
return arrGal ;
}