In the previous posting - I talked about why web content management is important as well as about the shortcomings in Microsoft Content Management Server. In this post, I will provide some first steps that you can follow to set up your first WCM site in MOSS 2007.
The next steps assume that you already have a Microsoft Office SharePoint Server 2007 up and running. In the next few steps we are going to create a new SharePoint based extranet site:
- Open SharePoint Central Administration and select the Application Management tab – you will see that underneath SharePoint Web Application Management, you can select Create or Extend Web Application.
- On the next page select Create a New Web Application
- On the Create New Web Application page we can specify a number of settings:
- We will create a new website in IIS on port 77 and we will keep the current path – c:\inetpub\wwwroot\wss\virtualdirectories\77
- Define security settings – SharePoint 2007 supports both NTLM and Kerberos authentication as well as Basic and a ASP.Net pluggable authentication mechanism.
- Create an application pool
- Specify Search Server – this is a new setting – if you create multiple SharePoint web applications you can let them use a common Search Server
- After you have create a SharePoint web application, you will still need to Create a new Windows SharePoint Services site collection .
- Select Create Site at this URL – URL path: (root)
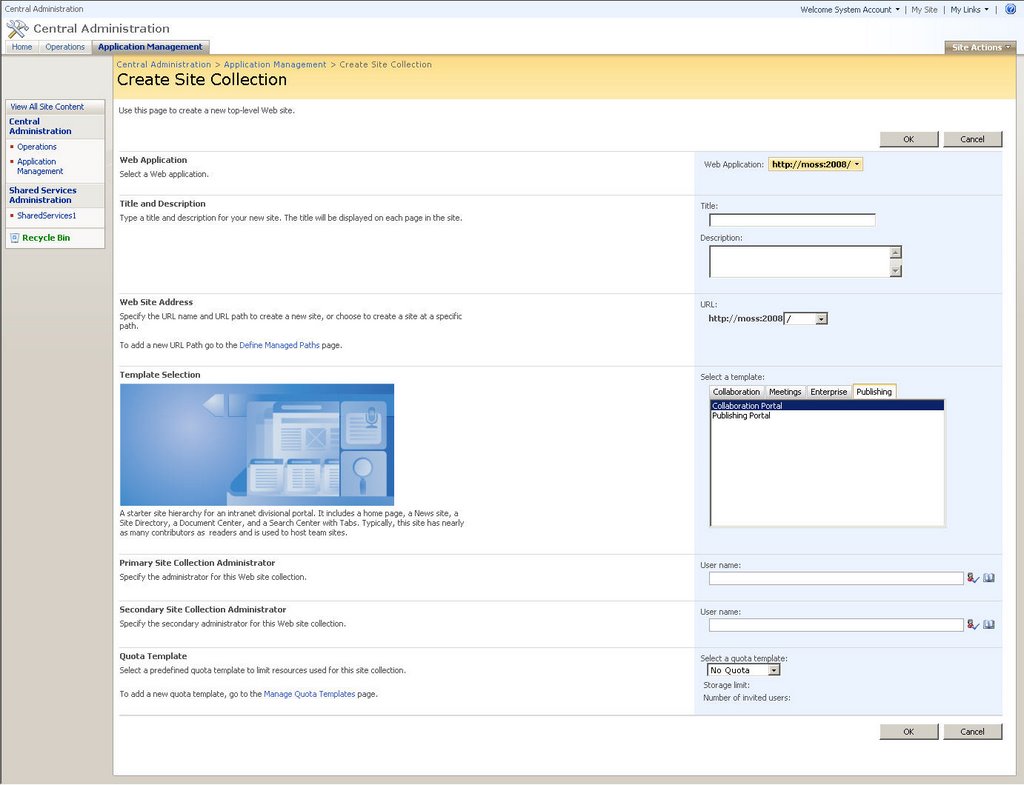
- Select the template you want to use – when you create a new site collection you can select some extra templates specifically for web content management scenario’s. The 2 site templates – available at root level - which by default support publishing features are:
- Publishing Portal : this site will contain a homepage, summary links and content by query webpart for rolling up information from a press release web site as well as a search results page and a login page.
- Collaboration Portal: intranet with typical functionalities such as News, Site Directory and Search Center features
- Select Publishing Portal
- Open your browser and navigate to http://localhost:77
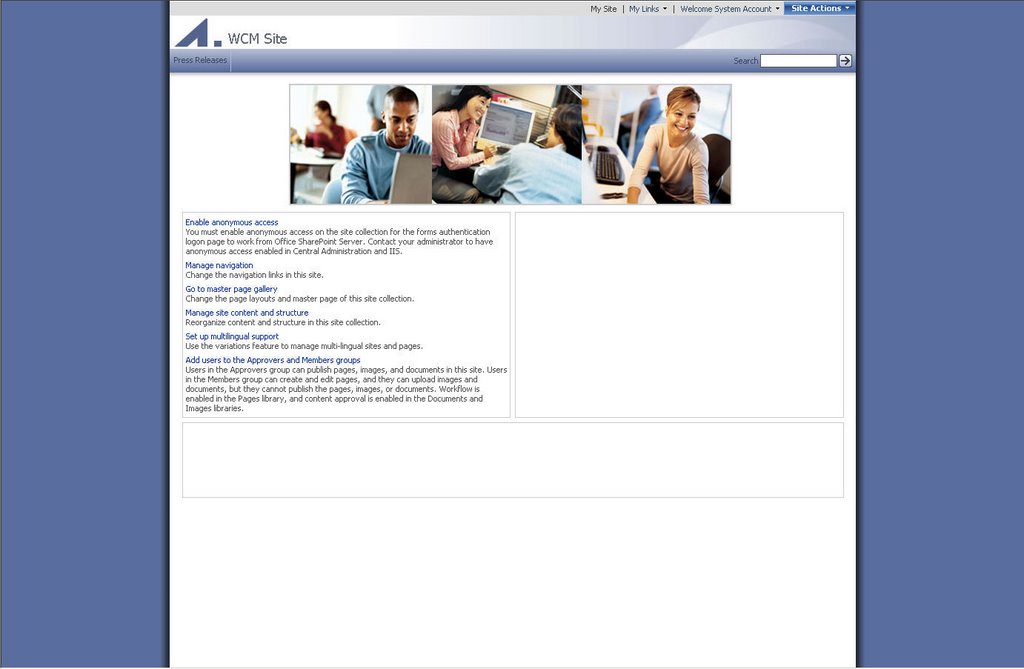
- The site currently works with integrated security and anonymous access is not enabled (For configuring anonymous access check out Enabling anonymous access in SharePoint 2007 – a nice feature in SharePoint 2007 is the ability to Sign in as a Different User as you can see when you click on Welcome System account in the top right corner. This is very helpfull when you want to test your site under multiple security profiles.
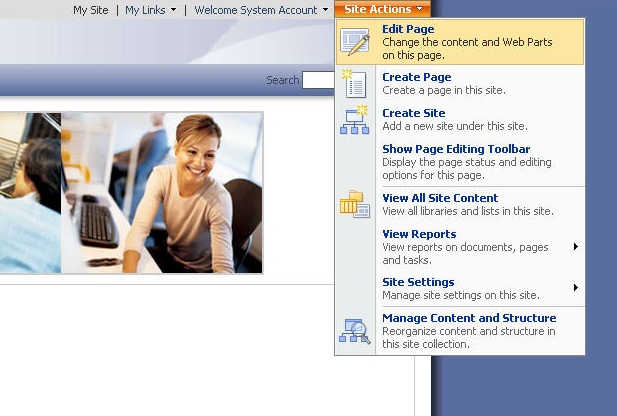
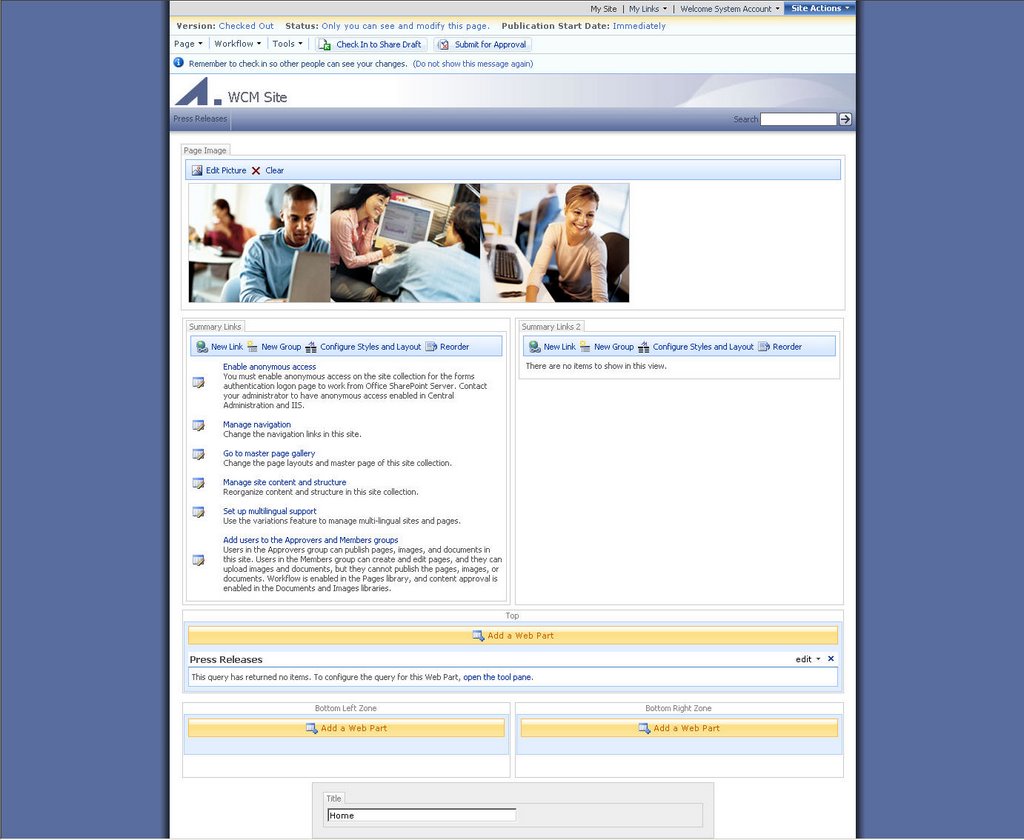
- Next to this menu you can find the Site Actions menu – select Edit Page to change the contents of the current page or add new web parts. When a page switches to edit mode, the Page Editing Toolbar becomes visible.

- In design mode you will also notice that the Web Content Management Tasks list on the first page is actually created by the Summary Links web part. This web part allows you to define a list of links – either to web pages or to people. For each link you can specify the grouping and ordering for the links as well as which will be style you use from a list of predefined styles. Remark: this list of predefined styles is defined in the XSL stylesheets found in the top-level Style Library. To make a new style available in the styles drop-down add a new XSL template to ItemStyle.xsl – for a detailed description take a look at How to: Customize styles . If you go to the file system – you will find the most important CSS files underneath c:\program files\common files\microsoft shared\web server extensions\12\templates\1033\Styles\ - controls.css, HtmlEditorCustomStyles.css, HtmlEditorTableFormats.css, portal.css and core.css. Of which Core.css is the equivalent of ows.css in WSS2.0 and portal.css the equivalent of sps.cssClick on the Site Actions menu – Select Create Page.

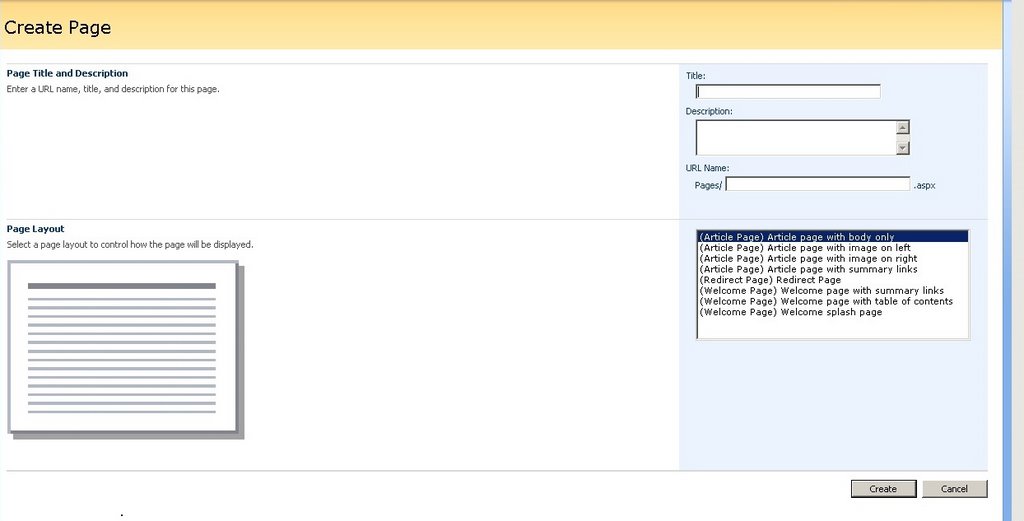
On the Create Page select the page layout you want to use. Select (Article Page)Article page with image on left. Depending on the page layout, you choose, your page will have a different look and feel and you will be able to add different types of content. Specify the title and a URL and click Create
- When the new page is created, you will notice that the Title is filled in into the Title placeholder control. On the middle of the page, you will notice the the Page Content placeholder – click Edit Content

- Type some random text and take a look at the available controls to format the text. Select the first line of text and click the Styles link. Change the style to ArticleByLine. You can also insert Reusable Content into the text you are editing as well as images through the
- To make this page visible to other users as well, it will need to go through the Approval workflow. Click on the Submit for Approval button on the top of the page. On the workflow initiation page you can specify the parameters used in the approval workflow such as the text you want to send in the approval e-mail, a due date and notification e-mails. Since I started with a blank site and only specified the administrator account to have access, this account will also be in the approvers group and the page will be immediately approved.
tags: wcm, moss2007, moss, sharepoint, sharepoint2007
2 comments:
If I have Publishing web under Publishing site, anonymous works great for father (site) and still brings auth dialog for son (web). For other templates, like Team, it works without issues.Breaking the inheritance and explicit defining of anonymous access on son site doesn't help.
Deactivating the lockdown mode and then create a new subsite also doesn't help
Post a Comment