In a previous post I talked about Features in MOSS 2007 and WSS 3.0 - these are a very powerful framework to extend your SharePoint platform. But at a certain point you will still need to deploy these features to your SharePoint servers (be it a single server or a complete web farm).
The best way to do this, is to create a SharePoint solution file - this is basically a cabinet file with the wsp extension. This WSP file can be used to deploy web parts, template files, assemblies, code access security policies, site definitions or features.
To create a solution file you will need to create:
- A manifest.xml file to specify what needs to happen
- A DDF ( data directive) file which tells makecab.exe how to structure your cabinet file. You will need to use makecab since you will need a folder structure within your cabinet file (similar to the structure you will need underneath the "12" hive.
In the previous post about features - I pointed to a nice example of how you can change the Site Actions menu with a feature - here you can download a solution which includes a wsp file. If you rename the wsp file to cab and extract the manifest.xml file you get the contents listed below.
<?xml version="1.0" encoding="utf-8" ?>
<Solution SolutionId="{5DA74A52-818A-4bba-B268-AD5E29361489}"
xmlns="http://schemas.microsoft.com/sharepoint/">
<FeatureManifests>
<FeatureManifest Location="SiteActionsSubMenuDemo\Feature.xml"/>
</FeatureManifests>
<Assemblies>
<Assembly DeploymentTarget="GlobalAssemblyCache"
Location="SiteActionsSubMenuDemo.dll">
<SafeControls>
<SafeControl Assembly="SiteActionsSubMenuDemo, Version=1.0.0.0, Culture=neutral, PublicKeyToken=e9db3057acd9c0f6"
Namespace="SiteActionsSubMenuDemo"
TypeName="*"
Safe="True" />
</SafeControls>
</Assembly>
</Assemblies>
</Solution>
After you have created the solution, you will need to deploy it to the solution store which is a central location for all solution files. After you have deployed the solution to a single server, the SPTimer service will synchronise/deploy the solution automatically to the other servers in the farm.


Required steps:
- Add solution: stsadm.exe -o addsolution -filename "solutionname.wsp"
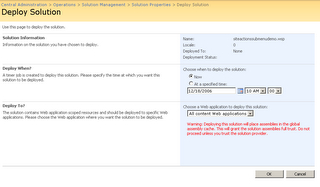
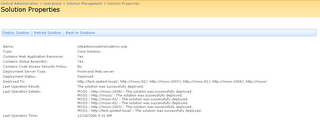
- Deploy solution - either from SharePoint Central Administration > Go to the Operations Tab - underneath the Global Configuration category you will see Solutions Management.
After you have deployed a solution you can still remove it - this action is called retracting. You can start retraction from the command line through stsadm.exe, from within SharePoint Central Admin or with the object model (Microsoft.SharePoint.Administration.SPSolution.Retract)
tags: sharepoint, sharepoint2007, wss3, moss, sharepoint+2007
3 comments:
Is there a way to avoid overwrite some o the files, webparts or other elements during deployment??
Try out this tool WSPBuilder, it can automatically create your WSP file.
http://www.wspbuilder.org
Here is a blog post that explains how to add wsp to the SharePoint solution store with a right click
http://chrisbarba.wordpress.com/2009/04/13/sharepoint-wsp…k-add-solution/
Post a Comment