This is the first installment of a series of postings about InfoPath and workflow in SharePoint 2007.
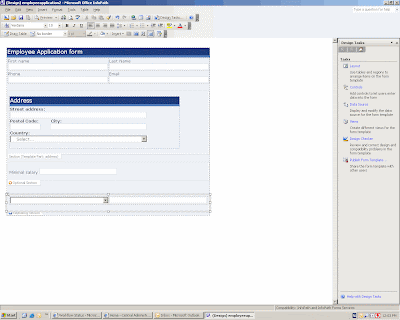
Open InfoPath 2007 and select Design a form template. Make sure that you check the "Enable browser compatible features only". Insert a layout table and add a number of textbox controls - firstname,lastname, phone and email.
InfoPath 2007 alllows you to use Template Parts - these template parts group. Template parts group pieces of a form template into a component that can be reused across multiple form templates. Template parts are always contained within Section controls. For more info take a look at the InfoPath team blog - Template Parts 101. If you need to add a template part - select Controls in the Design Tasks - and click Add or Remove Custom Controls. Now you can either add ActiveX controls to the controls which you can use in InfoPath or a template part which you have created previously.
Next insert an optional section and insert a salary textbox. You will use the optional section for data that users are not required to enter. Double click the salary textbox - change the data type to decimal(double) and change the format to currency. Notice that you can also specify data validation rules as well as mark the field as required.
Next, I add a repeating section (since I want to use a browser-enabled form I can't use the new horizontal repeating section). Insert into this repeating a custom layout table with 2 columns and 1 row and add a drop-down listbox to display a number of functions for which the candidate can apply. Since a candidate can apply for multiple functions - these controls are added to a repeating section. Also add an extra textfield in the repeating section where the applicant can add in some extra motivation about the function where he's applying for.
Last but not least, provide the applicant with a way to add his résumé - here you can use an attachment control. When you attach a file to a form, the original file will be converted using Base64 binary encoding. This means that these attachments will not be searchable in SharePoint. You could write an event handler which takes this attachment and stores it in a separate document library. Also not that the File attachment control will warn users when they upload a file which is larger than 1MB.
Now, your InfoPath form is finished and you will need to make it available for end users to fill it in. There are actually a number of ways to publish the InfoPath form template (to a file share, webserver or as an installable MSI). In this sample I will focus on publication to SharePoint and publish the InfoPath form to a document library. Create a new SharePoint site - using the blank site template.
Also remember that since your end users won't have the InfoPath UI available when filling in a form so there needs to be an alternative. Forms Services provides an alternative using Form toolbars which will display a number of buttons. You can change which buttons are visible by selecting Tools > Form Options in the browser category.
Click File >Publish - this will open the Publishing wizard. Select Publish to a SharePoint server with or without InfoPath Forms Services. (There also is a Lab about Publishing an InfoPath 2007 Form Template to a Server Running InfoPath Forms Services ). Select to create a new document library – call it Applicants and specify in the publishing wizard to create a new column - Firstname, lastname, salary. For other publishing options take a look at InfoPath Forms Management in Windows SharePoint Services v3 . Finally click publish and close InfoPath (Remember that when you are working in a Virtual PC - you might need to stop the system event notification service - Having problems with MOSS 2007 in Virtual PC - use net stop sens )
When you navigate to the Applicants document library and click New, it will open in InfoPath when you have InfoPath installed on the client. You can however force your InfoPath form to open in the browser even when an InfoPath client is installed. Click Settings > Form Library Settings. Underneath Advanced settings you can check "Display as web page". The form which will open should look like the image below.

No comments:
Post a Comment